Sunday, May 20, 2012

....is a Good Simple Burger, Smashed Potatoes & Boiled Corn

CPB made this meal, it's nothing fancy and it was quite tasty.

Burger:
2 Grilled Burgers
2 Buns
1 Avocado, Sliced
2 Slices Sharp Cheddar
1 Tomato, Sliced
4 Strips of Bacon

Potatoes:
6 Potatoes, Boiled & Smashed
2 Tbsp Butter
Salt & Pepper to taste

Corn:
1 Ear of Corn, Halved & Boiled
2 Tbsp Butter
Salt & Pepper to taste


Saturday, May 19, 2012

....is Cilantro Lime Shrimp, Two Ways


1 Package Uncooked Tortillas
1lb Cilantro Lime Shrimp (Precooked from Costco)
2 Avocados
2 Tomatoes
1 Jar Salsa Verde
1 Bag Mexican Cheese

The Cilantro Lime Taco
Follow instructions on Tortilla package to cook, the uncooked tortillas were a new thing for me and they're just lovely. Add remaining ingredients: Green Salsa, Avocado, Tomato, Cheese and Shrimp (another new and wonderful find).

The Cilantro Lime Tostada
Follow instructions on Tortilla package to cook. Place each tortilla back in the pan, melt cheese. Add remaining ingredients: Green Salsa, Avocado, Tomato and Shrimp.

Same ingredients, two great dishes! You don't need to double the ingredients, you should be able to make both a few times.

Friday, May 11, 2012

....is Lemon Risotto Reprise


....is Spicy Smoked Mozzarella Meatballs

Where has the month of June gone? or May for that matter.... somehow the days have blended and sadly my little blog has suffered. Here we are in July and it may look like I went on a cooking & baking rampage but even without posting the cooking and picture taking never stops. Here's a little something I made with a friend May 9th, a little something from Giada and it was delicious. (PS - I've learned how to Post Date Blog Entries)


1 Small Onion, Diced
1/2 Cup Parsley, plus 1/4 cup
2/3 Cup Parmesan Cheese, plus 1/4 cup
1/3 Cup Bread Crumbs
1 Egg
2 Tbsp Ketchup
3 Garlic Cloves, Minced
1/4 tsp Red Pepper Flakes
1 tsp Salt, plus more for seasoning
1/2 tsp Black Pepper, plus more for seasoning
16 oz. Ground Turkey
2 oz. Mozzarella Cheese, Cut into 16 (1/2-inch) Cubes

Position an oven rack in the lower 1/3 of the oven. Preheat the oven to 400 degrees.

In a large bowl, combine the Onion, 1/2 cup Parsley, 2/3 cup Parmesan, Bread Crumbs, Egg, Ketchup, Garlic, Red Pepper Flakes, 1 tsp Salt, and 1/2 tsp Pepper. Add the Turkey. Using your hands, combine all ingredients gently but thoroughly. Shape the meat mixture into 16 (1 1/2-inch-diameter) Meatballs and place on the prepared baking sheet. Make a hole in the center of each Meatball and place a cube of Mozzarella inside. Reform the Meatball so that the Mozzarella is completely covered with the meat mixture. Bake the meatballs for 15 minutes until cooked through.

....is a Wine Closet, Part 3: Final Installation


Finished and Filled!

At the Beginning.

The start of the installation, a structural board with marked screw locations gets drilled into the wall. Then a layer of wood glue, a shelf and a second layer of glue before screwing in the second structural board. The pattern gets repeated up the wall and didn't take long to finish. I thought it would take a couple people working on it and allowing time for the glue to dry but Mr. M was able to install it himself in an afternoon. I'm sure it was all the prep work Mrs. M and I did that simplified the process.

All but the top Shelf installed.

A few bottles to test it out.

A few more....

Final shelf in and another function added.

Mr. & Mrs. M drilled cork-sized holes in the top shelf, because of the height of the closet the top shelf wasn't fully functional as a wine shelf. So now it holds corks. Genius!

Monday, May 7, 2012

....is a Road Trip Home

6226 Seaview Ave NW
Seattle, WA 98107


980 Kruse Way
Springfield, OR 97477


1409 R Street
Sacramento, CA


1001 R Street
Sacramento, CA


8657 Villa La Jolla Dr
La Jolla, CA


2050 South Coast Highway 101
Cardiff, CA


3940 5th Avenue
San Diego, CA
  

Thursday, May 3, 2012

....is a Wine Closet, Part 2: Material Preparation

The closet begins to fill....
First let's rewind and I'll show you the prep work we did before the installation.

A home depot trip to get 18 pine boards. Originally 8'-0, they cut them down to the size we needed to fit the closet.

The Shelves - Cut
Mr. M and I set up the router and made a little wall with the extra pieces to help catch the sawdust. We used one small piece to run a test cut and then began with the actual boards.

We ran half of the boards through the router twice to create the one and a half inch groove. For the most part it went smoothly, there were a couple boards we had to run through again and a little sanding that happened later.

All the boards, routed and awaiting Paint!
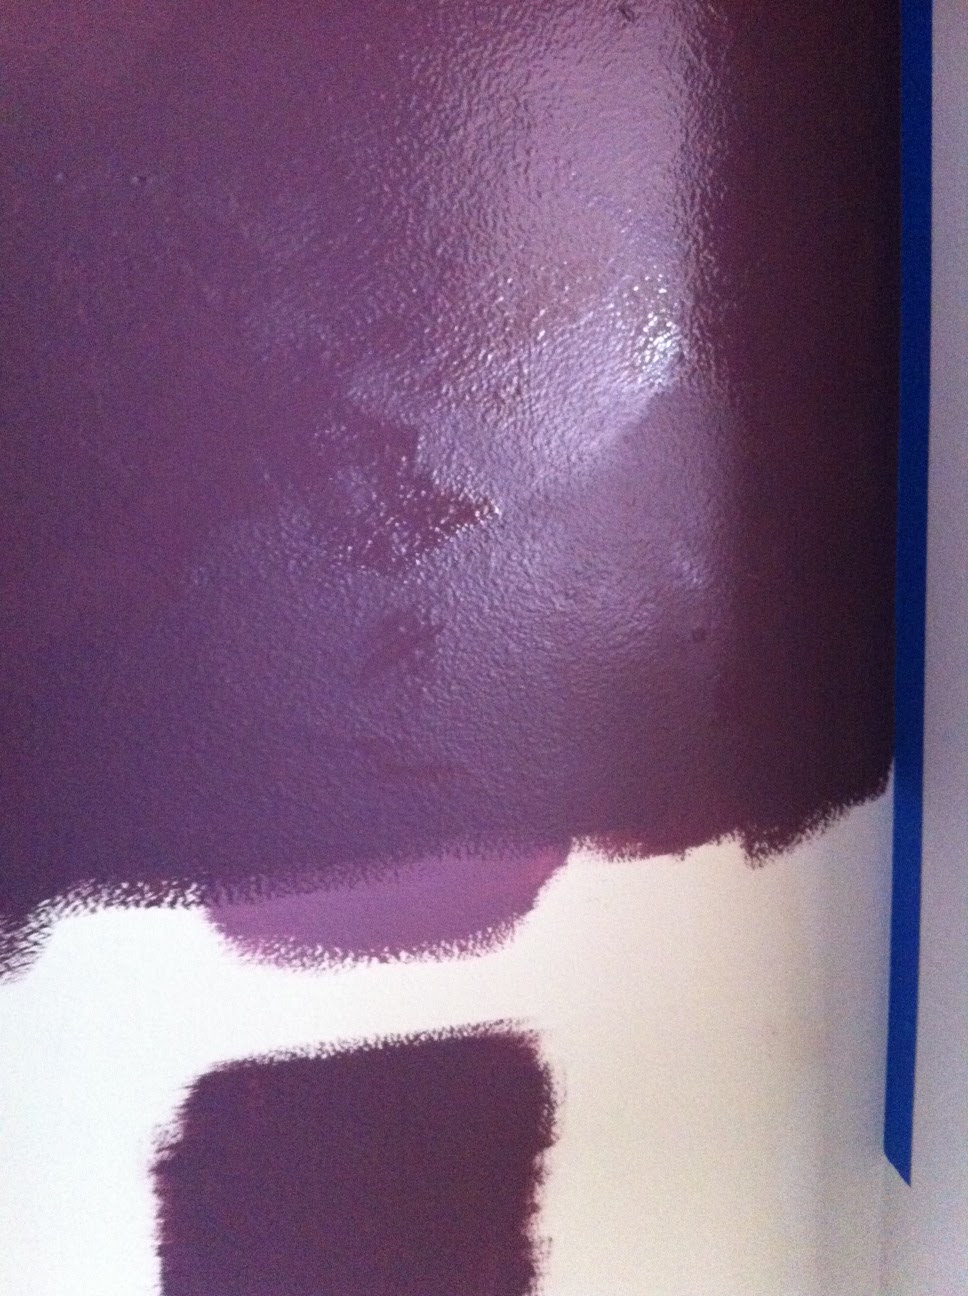
The Closet - Paint
We knew we wanted a purple, but in a small space with limited daylight we had to double check it wasn't too dark. So Mrs. M painted a few swatches of the two purple finalist.

It was a unanimous final decision for 'Shy Violet', the darker of the two. It's bold, fun and contrasts well with the light green walls in the living room. Even in the back corner of the closet it still looks purple.

Mrs. M did all the painting, I was there for opening doors and occasionally holding things. Also, at this point I was baking this delicious treat for Sunday night dinner with Mr. & Mrs. C.

The white walls all got a fresh coat of paint and it did amazing things to help brighten up the small closet. The purple only needed to go so far down the wall because support boards (also painted purple) will cover up the rest when the shelves are installed.

There's not real reason for this picture, I just want to show off the lovely color again...

The Structure - Puncture & Paint
Mrs. M and I lined up the support boards, taped them with painters tape (to keep them from shifting) and measured out where the screw holes were to be drilled. The distance was based on the studs in the closet wall, it was about every 16", this spacing will add an additional layer of support once installed. (Stud finders are a wonderful thing!) I marked the location and Mrs. M created a slight puncture that would still be visible after they were painted.

More of Mrs. M painting, it was all done in one day! The purple needed 2 coats (and it was a paint/primer combo) but it dried quick enough that by the time we finished the 9th board the 1st board was dry and ready for a second coat.

The Shelves - Paint
Where the structural boards only needed paint on 1 face the shelves needed to be pained on all but the edge facing the wall. We did one coat on the bottom and 2 on the top and front edge.

As you can see we had a really sophisticated set up. Shoe boxes and extra boards were used as drying racks. After this process I think I had Mrs. M convinced that a couple of saw horses would have come in handy. But honestly, we had the space we needed and because we were in the garage we weren't too concerned with the mess we made.

See, I help. Super Shelf Holder was my official title.

Painting done!

Previously
Coming Soon


LinkWithin

Related Posts Plugin for WordPress, Blogger...