First let's rewind and I'll show you the prep work we did before the installation.
A home depot trip to get 18 pine boards. Originally 8'-0, they cut them down to the size we needed to fit the closet.
We ran half of the boards through the router twice to create the one and a half inch groove. For the most part it went smoothly, there were a couple boards we had to run through again and a little sanding that happened later.
All the boards, routed and awaiting Paint!
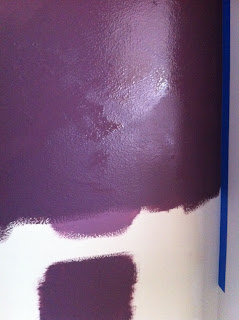
It was a unanimous final decision for 'Shy Violet', the darker of the two. It's bold, fun and contrasts well with the light green walls in the living room. Even in the back corner of the closet it still looks purple.
Mrs. M did all the painting, I was there for opening doors and occasionally holding things. Also, at this point I was baking this delicious treat for Sunday night dinner with Mr. & Mrs. C.
The white walls all got a fresh coat of paint and it did amazing things to help brighten up the small closet. The purple only needed to go so far down the wall because support boards (also painted purple) will cover up the rest when the shelves are installed.
More of Mrs. M painting, it was all done in one day! The purple needed 2 coats (and it was a paint/primer combo) but it dried quick enough that by the time we finished the 9th board the 1st board was dry and ready for a second coat.
As you can see we had a really sophisticated set up. Shoe boxes and extra boards were used as drying racks. After this process I think I had Mrs. M convinced that a couple of saw horses would have come in handy. But honestly, we had the space we needed and because we were in the garage we weren't too concerned with the mess we made.
See, I help. Super Shelf Holder was my official title.
Painting done!
The Shelves - Cut
Mr. M and I set up the router and made a little wall with the extra pieces to help catch the sawdust. We used one small piece to run a test cut and then began with the actual boards.We ran half of the boards through the router twice to create the one and a half inch groove. For the most part it went smoothly, there were a couple boards we had to run through again and a little sanding that happened later.
All the boards, routed and awaiting Paint!
The Closet - Paint
We knew we wanted a purple, but in a small space with limited daylight we had to double check it wasn't too dark. So Mrs. M painted a few swatches of the two purple finalist.It was a unanimous final decision for 'Shy Violet', the darker of the two. It's bold, fun and contrasts well with the light green walls in the living room. Even in the back corner of the closet it still looks purple.
Mrs. M did all the painting, I was there for opening doors and occasionally holding things. Also, at this point I was baking this delicious treat for Sunday night dinner with Mr. & Mrs. C.
The white walls all got a fresh coat of paint and it did amazing things to help brighten up the small closet. The purple only needed to go so far down the wall because support boards (also painted purple) will cover up the rest when the shelves are installed.
There's not real reason for this picture, I just want to show off the lovely color again...
The Structure - Puncture & Paint
Mrs. M and I lined up the support boards, taped them with painters tape (to keep them from shifting) and measured out where the screw holes were to be drilled. The distance was based on the studs in the closet wall, it was about every 16", this spacing will add an additional layer of support once installed. (Stud finders are a wonderful thing!) I marked the location and Mrs. M created a slight puncture that would still be visible after they were painted.More of Mrs. M painting, it was all done in one day! The purple needed 2 coats (and it was a paint/primer combo) but it dried quick enough that by the time we finished the 9th board the 1st board was dry and ready for a second coat.
The Shelves - Paint
Where the structural boards only needed paint on 1 face the shelves needed to be pained on all but the edge facing the wall. We did one coat on the bottom and 2 on the top and front edge.As you can see we had a really sophisticated set up. Shoe boxes and extra boards were used as drying racks. After this process I think I had Mrs. M convinced that a couple of saw horses would have come in handy. But honestly, we had the space we needed and because we were in the garage we weren't too concerned with the mess we made.
See, I help. Super Shelf Holder was my official title.
Painting done!
Previously
Coming Soon


WOW!!! This is awesome!! What a neat idea. And I love your very sophisticated set up.. looks like something Id come up with. Haha :)
ReplyDeleteHaha, thanks! It was a fun day. Did you see the Part 1 with the weight test? I think that's my favorite. I've got one more post to show the final instalation which I actually missed, it was put in just after I moved. :( But Mr. & Mrs. M did an amazing job! I think they're really happy with it.
ReplyDelete